

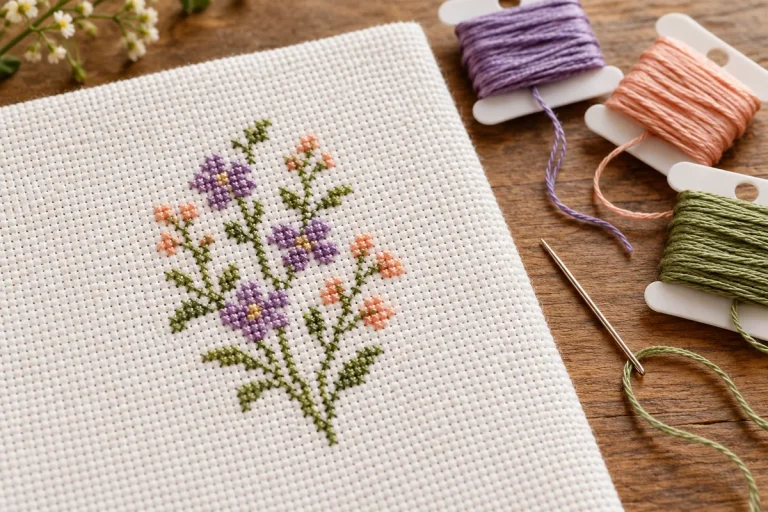
Wildflower cross stitch becomes easier to manage when you decide how to move through the chart before threading the first needle. Fine stems, scattered petals and similar greens need dependable reference points. This plan helps you build those references without carrying thread across large empty spaces.

Read the whole chart before choosing a starting point
Find the chart center, overall stitch dimensions and any page overlap. Identify the stitch types and whether the key includes blends or backstitch. On a multi-page pattern, establish how the pages connect before making marks or cutting printouts apart.
Use a working copy or a digital marking method that leaves the original intact. If a symbol seems ambiguous, resolve it before stitching that color in several places. Our PDF chart reading guide explains keys, grid lines and page joins.
Choose a small, recognizable anchor
The center is a useful reference, but the first actual stitches do not have to form an entire central flower. Choose a nearby cluster that is easy to count and check its position from the center in both directions. Keep a note of that relationship so later stems have a reliable origin.
Avoid starting with a long, isolated stem that has no neighboring stitches to confirm it. A petal cluster or a compact group of leaves may provide a better checkpoint. If the pattern gives a specific working order, follow its instructions instead of forcing a different method.
Divide the meadow into manageable zones
Use the chart’s major grid lines to describe sections, such as the upper-left flower cluster or the stems around the central bloom. These are planning boundaries, not extra lines to stitch. Aim to complete a recognizable area before moving to one far away.
A section can be smaller than a full page. The useful size is one you can mark accurately and return to without guessing where you stopped. Note any incomplete stitches that continue into the next zone, particularly where a flower head crosses a page boundary.

Balance local stitching and color efficiency
Working one color across the whole design can reduce rethreading, but it can also create long jumps and make a counting mistake harder to locate. Completing a small area color by color gives you more local reference points. Choose the method that makes your chart easiest to track.
For open floral patterns, avoid carrying a dark green across bare fabric behind pale petals. End and restart when a carry would show or remain unsupported. Keep top legs consistent even when you change your direction of travel through a section.
Label similar greens before they get mixed
Prepare separate labeled holders for shades that look alike. Keep the symbol or color number beside each thread rather than relying on memory. If you use more than one threaded needle, label the organizer clearly and keep needles secured when you stop.
Compare a questionable shade with the key before stitching. Do not solve uncertainty by substituting the nearest-looking green halfway through a leaf. If a deliberate substitution is needed, write it down and apply it consistently; our color substitution guide can help.
Check three landmarks before expanding a section
Before filling a large flower head, confirm its center, one outer edge and its relationship to the nearest completed stem or leaf. Count from two directions when possible. A correct width alone will not reveal a flower that has been shifted vertically by one row.
Pause at the end of each zone and compare its outer contour with the chart. Correct an important misplaced stem before building several flowers on top of it. For less disruptive corrections, consult our mistake-fixing guide rather than hiding an error that changes the composition.
Add outlines and inspect the open areas
When backstitch is specified, work it after the surrounding crosses unless the designer instructs otherwise. Follow the indicated strand count so an outline supports the petals rather than overwhelming them. Check that long lines are secure and that no dark loose ends show through an open area.
Before finishing, inspect both the front and back under ordinary light. Use care instructions appropriate to your fabric and all the threads involved. DMC’s cross stitch overview provides a useful reference for the basic technique; our hoop finishing guide covers the final mounting stage.
Questions about working scattered floral designs
Should I stitch all the stems first?
Only if their positions can be checked reliably. A framework can help, but one wrong stem may shift several flower heads. Establish local checkpoints as you go.
Do I need to grid the fabric?
It is optional. If you choose a marking method, follow its manufacturer’s instructions and test it on the same fabric. Do not assume every pen or thread will remove cleanly.
Still choosing a chart?
Compare the shapes in our meadow, wreath and bouquet guide, then explore the floral pattern collection.
Cover photograph: Jake Anthony. In-article photograph: Benjamin White. Photographs used under the Unsplash License.

 English
 French
 Spanish
 German
 Arabic