
If your project basket is full of short ends of red, gold, green and blue yarn, a scrap-buster holiday light garland crochet project is a cheerful way to use them. Instead of buying a perfectly matching yarn set, you create a series of little Christmas-light shapes and connect them along a soft crocheted cord. The result adds color to a mantel, a craft room or a winter display—with no electrical wiring and no real illumination.
This guide covers two clearly different ways to make the idea. First, it helps you prepare for Carla D. T. Fisher’s free, three-dimensional C9-style holiday light garland, with accurate yarn estimates and a direct link to her official pattern. Second, it offers an original flat crochet lightbulb appliqué you can try with smaller scraps. The flat version is a separate educational design written for this article, not a copy of Fisher’s rounds or a test-crocheted sample. It is included here so you can choose between a dimensional garland and a simpler flat one.
Where to get the original free Scrap-Buster Holiday Light Garland pattern
The design spotlighted in the Winter Crochet Garlands roundup on WoolPatterns comes from Carla D. T. Fisher, not from the roundup’s author. The original Scrap-Buster Holiday Light Garland on Ravelry is the correct place to download the designer’s free pattern and view her project photographs. Published in December 2022, it creates realistically proportioned C9-style decorative bulbs with crocheted sockets and a cord.
The Ravelry pattern listing specifies US crochet terminology, worsted-weight yarn and a 2.75 mm (C) hook. It mentions working in rounds, a magic ring, single crochet, chain stitches, back-loop-only and front-loop-only stitches, plus invisible decreases. The designer offers it as a free download but asks readers not to redistribute the pattern as their own. For that reason, the designer’s actual 3D instructions are not copied below.
| Original pattern fact | Designer-reported detail | How to use the information |
|---|---|---|
| Designer | Carla D. T. Fisher | Credit the designer and download from her Ravelry page |
| Format | Free crochet pattern download | Check your chosen reader and keep the official chart/instructions |
| Bulb shape | Three-dimensional C9-style decorative light | Work from the original designer’s exact rounds for the 3D version |
| Yarn | Worsted weight; suggested Red Heart Super Saver | Compare all scraps for a reasonably consistent finished scale |
| Hook | 2.75 mm (C) listed | Use the designer’s recommendation and check your stitch density |
| Techniques | US terms, magic ring, sc, ch, sl st, BLO/FLO, invisible decreases | Practice any unfamiliar stitches before assembling the full garland |
The author also provides approximate yarn amounts for a single bulb, its socket and a ten-foot cord. Those estimates are helpful for sorting scraps, but yarn usage varies with personal tension and length. Don’t advertise a project made from the original design as a new, original XStitchPattern crochet pattern; use the designer’s own credit and terms.
What do the crochet Christmas light bulbs actually look like?
A classic oversized holiday string light has three easily recognized parts: an elongated colored bulb, a darker socket at the broad end and a cord that connects the sockets. On a dimensional crochet version, the bulb has a rounded profile rather than lying flat. The choice of colors creates most of the effect, so simple shapes can look festive without sequins, metallic paint or real light fixtures.
You may see decorative photographs of felt light ornaments or pom-pom strings in this article. Those are visual references for shapes, colors and styling only. They are not photographs of the Ravelry pattern crocheted by us, and the illustrated flat appliqué below has not been photographed as a finished test sample.
Design a color sequence before making fifteen bulbs
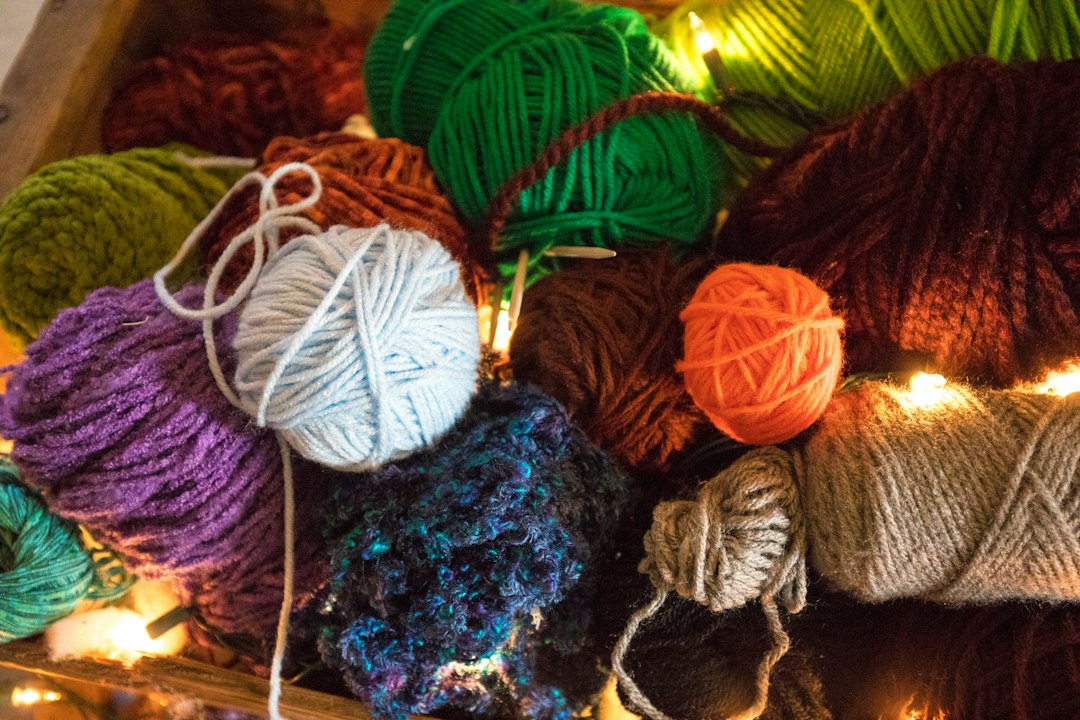
Lay all your usable yarn scraps on a table and group them into colors that are distinct at a distance. One combination is red, yellow, teal, pink and lime repeated along a darker cord. Another is a quieter vintage palette of cream, russet, olive and dusty blue. The idea is not to choose the most individual colors; it’s to create enough contrast that the lights read as separate shapes.
For example, if you have four red scraps, two green, three yellow and one blue, avoid placing three red bulbs side by side unless that’s intentional. Balance bright, warm colors with cool colors along the length. Prepare the entire sequence on paper before fastening the bulbs to the cord. That avoids a heavy group of similarly colored lights at one end.
Supplies for a colorful crochet light garland
- Scrap yarn in multiple colors. For the original C9-style version, start with the designer’s suggested worsted weight; keep fibers and thickness reasonably similar for consistent proportions.
- Dark green, charcoal or brown yarn for sockets and cord. A consistent neutral shade ties different bulb colors together.
- Crochet hook. For the Carla Fisher design, the listing specifies 2.75 mm; the flat variation below can be tested with a hook suitable for your yarn and desired density.
- Stitch markers and a yarn needle. Mark spiral rounds, sew securely and weave in tails.
- Scissors and suitable stuffing. Use stuffing only if the chosen 3D pattern calls for it; the flat appliqué needs no filling.
- Measuring tape and notepad. Plan the cord length and count the bulbs before using up your darkest yarn.
Mixing thick chenille with thin cotton on one garland can make bulbs very different sizes. That may be artistic, but it becomes awkward when the pieces need to hang at uniform intervals. Work one trial bulb using your most common yarn before producing every color. The Craft Yarn Council yarn-weight guidance provides a useful reference when comparing leftover labels.
How much yarn does a scrap-buster light garland need?
Le designer’s Ravelry listing estimates approximately 6 yards per bulb, 2 yards per socket and 50 yards for the cord of a ten-foot garland. The cord estimate assumes the original method, gauge and a length of about ten feet. Use these numbers as planning estimates, not as a guarantee for an alternate pattern or a different hook size.
| Example C9-style collection | Bulb yarn | Socket yarn | Cord estimate | Illustrative total |
|---|---|---|---|---|
| 6 bulbs | 36 yd | 12 yd | 50 yd | 98 yd |
| 10 bulbs | 60 yd | 20 yd | 50 yd | 130 yd |
| 12 bulbs | 72 yd | 24 yd | 50 yd | 146 yd |
| 16 bulbs | 96 yd | 32 yd | 50 yd | 178 yd |
The totals simply add the listed approximate amounts—(number of bulbs × 6) + (number of sockets × 2) + 50. If you make a shorter or longer cord, substitute the actual amount for the 50-yard estimate. The cord may be the biggest single yarn requirement, so check that your chosen green scrap is long enough before making sixteen brightly colored bulbs. If necessary, choose a compatible darker yarn specifically for the cord while continuing to use short leftovers for the bulbs.
How many feet of garland should you make?
Begin by measuring the area you want to decorate, then add some slack for a natural hanging curve. A mantel, stair rail and small window will not need the same length. Set your bulb count based on the measured distance and the spacing you prefer rather than using a stock “twelve bulbs” rule. If you need a ten-foot garland and ten bulbs, you have roughly one bulb for each foot before allowing for drape and end loops. That is a spacing idea, not a fixed instruction from the designer.
The original pattern is intentionally flexible about finished length, and switching yarn weights can change individual bulb size. Compare two completed bulb units on a piece of string before committing to the spacing of the whole set.
How to crochet the original dimensional holiday light garland
For the original C9-style look, follow Fisher’s free Ravelry PDF for the actual bulb shaping, socket and cord. The safe preparation and assembly process is straightforward even when the exact rounds are in a separate pattern:
- Download the designer’s free instructions. Use the official Ravelry pattern for round-by-round counts, not a promotional photo or a reconstructed version of the chart.
- Test one colored bulb. Use the yarn weight and hook recommended by the designer, checking that the fabric is sufficiently dense and the shape is easy to recognize.
- Make the matching socket. Follow the PDF’s method for the darker cap; verify that its opening and the bulb’s broad end fit together before sewing.
- Prepare all the other colors. Keep each bulb’s stitch count and yarn weight consistent so your set hangs evenly.
- Join and secure components. Attach the socket to its corresponding bulb according to the original directions and hide yarn tails securely.
- Make the cord to your planned length. Follow the designer’s cord instructions; measure while working, since crochet chain tension affects length.
- Attach units at regular intervals. Lay all finished bulbs out along the cord first, then fasten them evenly without twists and test how the strand hangs.
- Inspect and display. Check every attachment before draping on a mantel or shelf and use only as a decorative, non-electrical garland.
This isn’t a replacement for the designer’s detailed 3D rounds. The free PDF is the source of truth for exact increases, decreases, yarn placement and the assembly method. If your first bulb is too soft, check tension and gauge; if it’s distorted, recount the affected round before making the rest.
Free original alternative: a flat holiday light crochet appliqué
Want a smaller, easier option for very short scraps? The following original flat bulb motif is independently written for this article and is visually different from Fisher’s stuffed C9 design. It uses rows rather than a three-dimensional spiral and a separately crocheted rectangular cap. No stuffing or electrical components are needed. The instructions are mathematically count-checked but have not been physically test-crocheted; try one swatch and adjust shape or gauge before making a full strand.
US crochet terms and basic setup
Use a smooth yarn in any bright color and a hook that gives even single-crochet fabric. Work through both loops unless specified otherwise. A turning chain never counts as a stitch in the instructions below. Stitch counts in parentheses tell you how many working stitches should remain at the end of that row.
| Abbreviation | Meaning in US crochet terms | Reminder |
|---|---|---|
| ch | Chain | Create the foundation and turning chain |
| sc | Single crochet | One compact stitch into one indicated stitch |
| inc | Increase | Work two single crochets in the same stitch |
| dec / sc2tog | Decrease | Combine two adjacent stitches into one |
| FO | Fasten off | Cut yarn and secure the final loop |
Le Craft Yarn Council’s crochet abbreviation guide is a reliable reference for US terms. Note that UK double crochet corresponds to US single crochet; a UK pattern written with “dc” should not be treated as US double crochet.
Flat bulb piece — eight short rows
- Row 1: Chain 5; sc in the second chain from the hook and in each remaining chain (4).
- Row 2: Ch 1, turn. Inc in first stitch, sc in next 2 stitches, inc in last stitch (6).
- Rows 3–5: Ch 1, turn. Sc across (6 per row).
- Row 6: Ch 1, turn. Dec over first 2 stitches, sc in next 2 stitches, dec over final 2 stitches (4).
- Row 7: Ch 1, turn. Sc across (4).
- Row 8: Ch 1, turn. Dec twice (2). FO and weave in the end.
The broader section forms the rounded lightbulb body, while the two-stitch end is the decorative pointed tip. In the flat arrangement, the four-stitch foundation edge is the upper end that will meet the socket. If the side edges curl, lay the piece flat and assess the stitch tension before adding the cap. A simple edge of evenly spaced single crochet can be added as a separate personal variation, but is not required for the eight-row shape.
Simple dark socket — two rows
With dark green, black or charcoal yarn, chain 5. Row 1: sc in the second chain from the hook and in each remaining chain (4). Row 2: ch 1, turn, sc across (4). Fasten off leaving a yarn tail. Place the socket against the bulb’s original four-stitch foundation edge and sew the two pieces together with neat matching passes.
If you would like the cap taller, add another row of four single crochets; note that it changes the original two-row mini version. Aim for a clean rectangular socket that contrasts with the bright bulb. Keep the stitch and seam tails on the reverse so the front stays uncluttered.
Joining a string of flat lights
Crochet a foundation chain using a darker yarn until it reaches your desired hanging length. For a sturdier flat cord, work a return row of single crochet along the chain if you have enough yarn, then secure the ends. Pin each little bulb socket at equal measured positions along the cord and sew securely through the socket and cord. Lay the complete chain flat to check spacing before hanging.
You can also sew the appliqués to a wider decorative yarn strip or a textile ribbon, but don’t wrap them around an active electric light set. The flat design is suitable for wall decor, a craft-room banner or gift wrap, not as a functioning lamp. Make a small test section before you rely on the finished length: varying yarn and hook sizes will change how many chain stitches you need.
Choosing colors for a balanced scrap yarn Christmas garland
The easiest way to make mismatched leftover colors feel intentional is to repeat one color for every socket and the entire cord. The bright bulbs can then vary freely: scarlet, mustard, teal, lilac, bright blue and pink all work against a forest-green connector. For a more subdued cottagecore look, use rust, cream, dusty green and plum with a warm-brown cord.
If you have a lot of one color and little of another, place the rare color near the middle as an accent rather than repeating it randomly. A garland with ten bulbs might use three red, two teal, two mustard, two sage and one cream. This is an original planning example, not a specification of the Carla Fisher pattern.
Should you mix yarn weights to use every scrap?
Not if you want a uniform set without testing. In three-dimensional work, a heavier yarn can create a larger bulb using the same rounds. In a flat appliqué, thicker yarn changes the finished height and how the socket lines up. You can group scraps by thickness or make a playful intentionally mixed-size strand, but decide which look you want before cutting the cord.
How to style a non-electrical crochet light garland
A colorful yarn garland works beautifully on a mantel against a plain wall, wrapped around a small decorative shelf, or hanging above a craft table. It can also decorate a winter party backdrop with other paper or textile ornaments. Avoid hanging it within reach of young children or pets, close to candles, or where it could tangle with real electrical cables.
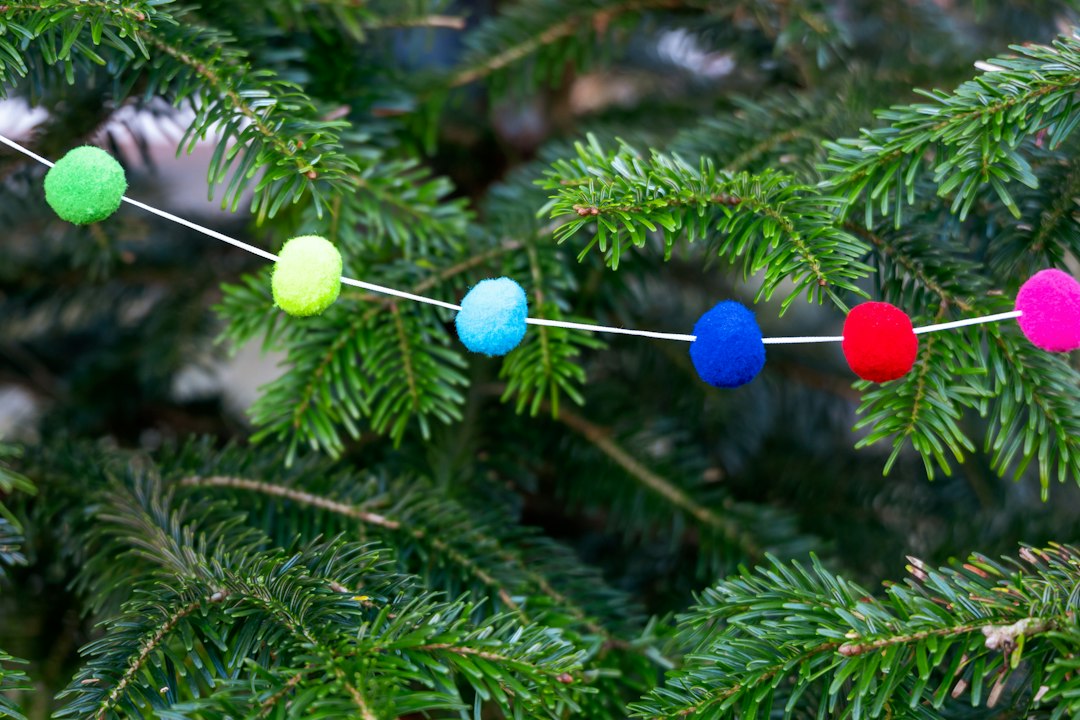
The photograph above shows a separate type of yarn garland, not the finished bulbs from the linked Ravelry instructions. Its purpose is to illustrate how repeating colors and spacing can create visual rhythm on a tree. The same principle applies to either the three-dimensional lightbulb pattern or the flat version in this article.
Pair the garland with other handmade ornaments
For another three-dimensional yarn craft, our Christmas Cat Ball Crochet Ornaments tutorial covers festive crocheted animals and hanging loops. If you’d rather try a soft animal as a nonseasonal project, our cute bunny amigurumi guide includes separate original practice rounds.
Crochet and counted cross stitch are different techniques, but they can share a holiday display. Our sixteen Christmas mini cross stitch bundle planning guide is useful for coordinating gift styles and colors, and the cross stitch ornament finishing article covers an entirely different stitched-fabric project.
If you like the festive look but prefer a counted cross stitch PDF, try our Christmas Ornaments Cross Stitch Pattern or the Christmas Book Tree design. Both are separate purchasable embroidery products with digital downloads, not crochet-light patterns or extra files supplied with Carla Fisher’s free tutorial.
Looking for more handmade holiday PDF designs? Browse the XStitchPattern Etsy shop for our current cross stitch collection. Those are separate counted cross stitch patterns, not Carla Fisher’s crochet garland PDF or a downloadable version of this flat appliqué.
Safety and durability: treat the light bulbs as textiles
The knitted or crocheted holiday-light shapes in this guide are non-electrical decorative objects. They do not contain a bulb, lamp, current, battery or heat-resistant wiring. Never place yarn directly over a powered string light, fireplace opening, lit candle or hot lamp. If the strand hangs near a wall outlet or furniture, route it away from real cords and heated components.
Avoid loose beads and glued-on parts if small children could handle the decoration, and secure all sewing tails. A garland with long loops or cords can pose an entanglement risk for babies, toddlers and pets; display it high and out of reach. For storage, roll the garland loosely around a card and keep it dry so the bulb shapes don’t become flattened or tangled.
Troubleshooting common crochet garland problems
| Problem | Likely reason | Practical fix |
|---|---|---|
| Bulbs vary noticeably in size | Scraps differ in weight or your tension changed | Group yarn by weight or embrace intentional mixed sizes |
| Flat bulb edges curl | Tight turning chains or uneven row tension | Test a slightly larger hook and lay one sample flat |
| Socket doesn’t sit squarely | The cap and bulb edge have different stitch widths | Check the four-stitch foundation edge and cap row count |
| Cord twists or sags unevenly | Bulbs attached at inconsistent intervals | Lay out, measure and pin every socket before sewing |
| Stuffing peeks through 3D bulb | Fabric is too open for the filling | Check the designer’s hook and yarn guidance; work a sample |
| Lights slide along the strand | Attachment passes aren’t secured | Sew through both socket and cord with multiple neat passes |
Frequently asked questions
Is Carla D. T. Fisher’s Scrap-Buster Holiday Light Garland pattern free?
Yes. The designer offers the original three-dimensional C9-style light garland as a free download on Ravelry. The download remains her work, so this article links to it and credits her instead of reproducing the full written instructions.
How much leftover yarn is needed per holiday light?
The designer lists approximately six yards for a bulb and two yards for its socket. Your actual use depends on tension and materials, and the cord takes additional yarn. The example table above also uses the designer’s roughly 50-yard estimate for a ten-foot cord.
Which hook should I use for the original garland?
The Ravelry listing specifies a 2.75 mm hook for worsted-weight yarn. That is the designer’s suggestion for the original pattern; your own tension may affect density and finished scale.
Is the flat appliqué in this article the same as the Ravelry pattern?
No. The original designer’s pattern makes three-dimensional bulbs. The eight-row flat bulb and two-row socket written here are an independently developed, simpler flat variation for this article. They haven’t been physically test-crocheted, so try a sample and adjust the finishing as needed.
Can I crochet this garland with cotton scraps instead of acrylic?
Often yes for a flat decorative variation, provided your hook makes stable fabric and the scraps are a similar weight. For the designer’s exact three-dimensional proportions, switching fiber and gauge may change the bulb shape and size. Always make one trial unit first.
Can you put crochet bulbs over working Christmas lights?
Do not treat this pattern as a safe cover for powered electrical bulbs or LEDs. It is decorative only. Yarn and stuffing are combustible materials, and the crochet parts are not tested electrical components or lamp covers.
Can I use this garland outside?
An ordinary yarn garland is better for protected indoor display. Rain, strong sunlight and dirt can change its shape or appearance, and many yarns are not designed for prolonged outdoor exposure. If you want outdoor decor, choose materials and construction specifically intended for that environment.
How do I store a long crochet light garland?
Let it dry completely, gently straighten the cord, then coil it loosely around a firm piece of cardboard or a smooth storage spool. Keep it away from sharp hooks and heavy objects that could flatten the decorations.
Use your scraps to make something cheerful
A scrap-buster holiday light garland is memorable because it turns overlooked pieces of yarn into a deliberate decoration. For the dimensional oversized-bulb result, begin with Carla D. T. Fisher’s original free Ravelry download. For a simpler no-stuffing experiment, try the original flat appliqué provided above, then build a color sequence that suits your room. Measure the display area, test one light and choose consistent intervals before attaching the whole strand.
Explore more yarn ideas in our bunny crochet amigurumi article and festive cat ball crochet guide. For a different needlework technique, you can join XStitchPattern’s free-pattern newsletter for counted cross stitch updates. The newsletter and our Etsy designs are separate from Fisher’s free crochet download.
Photo credits: Mel Poole (felt holiday lights), Jason Leung (colorful yarn) and Sergej (yarn pom-pom holiday garland), via Unsplash. The editorial photographs show mood, materials and comparable seasonal shapes—not a crocheted test sample of either pattern discussed in this guide.