

Wedding cross stitch patterns become lasting keepsakes when the names, date and layout are accurate. Start with the couple’s preferred wording and the display size, then choose a floral wreath, paired motif or sampler that leaves enough room for personalization. Proof the information before stitching rather than treating the text as a final decorative extra.
Planning note: Use the couple’s confirmed ceremony date; wedding seasons vary by location.
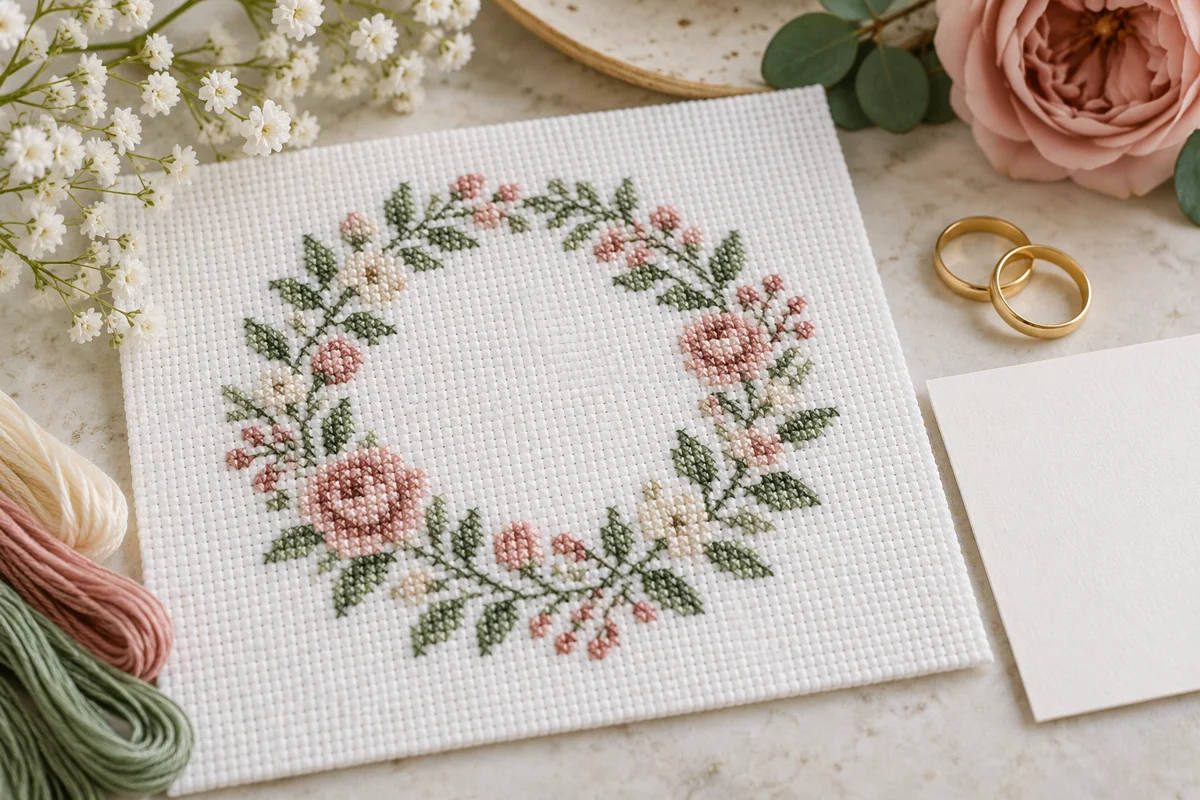
Get the wording approved before choosing the alphabet
Ask the couple which names and date format they want recorded. Ceremony dates can change, and a legal name is not always the preferred display name. Write the approved wording on a separate reference sheet and keep it with the chart. Do not assume a relationship title or a particular family structure.
Choose a charted alphabet whose letter height suits the surrounding motif. A long name may require a different arrangement from a short one. Count every letter and gap before placing the line, and avoid squeezing characters by removing squares that define their shape.
Balance the text with the floral or geometric border
A wreath needs enough open space for the complete wording, including the widest line. Sketch the layout on a grid and check the vertical spacing between names and date. The center of an even number of squares lies between squares; for an odd number, it falls on a square. Use the same reference when positioning the text inside the border.
For example, a sampler 112 squares wide measures 8 inches on 14-count Aida and 7 inches on 16-count. These are design dimensions only. Add mounting allowance and compare the outermost stitch, including any backstitch, with the actual frame opening. A nominal frame size does not always equal its visible aperture.
Make the finish suit the couple’s home
Choose colors and a frame style that the recipients would enjoy beyond the wedding day. A soft floral palette can work well, but it still needs enough contrast between petals, lettering and background. Test the darkest and lightest shades on the real fabric before making substitutions.
Confirm the ceremony and presentation date directly; wedding seasons differ by country and couple. Leave time for any permitted fabric care, drying, mounting and secure packaging. If you are short of time, a smaller personalized piece can be a better gift than a large sampler delivered unfinished.
Before you begin
- Read the actual symbol chart, thread key and stitch-type notes.
- Calculate the design area and add the allowance required for your chosen finish.
- Test the intended cotton and fabric together on an offcut.
- Keep a readable working copy and check the first completed motif before repeating it.
Questions and next steps
Should I stitch the ceremony date or the legal wedding date?
Use the couple’s approved choice. Do not guess if the two dates differ.
Can I add names to any floral pattern?
Only if there is enough chart space and the designer’s usage terms permit your adaptation. A ready-made wreath may need a different layout.
Is a wedding sampler suitable for an anniversary?
Yes, with the recipient’s preferred wording and date. Recheck numeral widths if you add an anniversary number.
For practical preparation, see planning charted name spacing, and framing a personalized keepsake.
For another seasonal project, explore Valentine Cross Stitch Patterns or Graduation Cross Stitch Patterns. Choose a chart that is actually supplied or available to buy; this selection guide does not promise a new downloadable pattern.
For general counted-stitch and fabric guidance, see DMC’s cross stitch introduction.
 English
 French
 Spanish
 German
 Arabic