
A Christmas ornaments cross stitch pattern can be more than a handful of tiny motifs. For a playful jar-shaped snow globe composition, see our Christmas jar cross stitch guide. When the design combines pine greenery, a little winter cottage and traditional baubles in a single composition, it becomes a seasonal artwork you can display year after year. The key is to treat it like the substantial stitching project it is: check the chart size, choose a comfortable Aida count, plan the finish and keep your working copy easy to follow.
Here is a practical, pattern-specific guide for stitchers considering the Green Christmas Ornaments design from XStitchPattern. It covers what is in the actual PDF, how the eleven-color palette works, why white thread and unstitched background are not the same thing, and how to turn a 300 × 274-stitch chart into an achievable holiday project.
Meet the design: three ornaments, one complete holiday composition
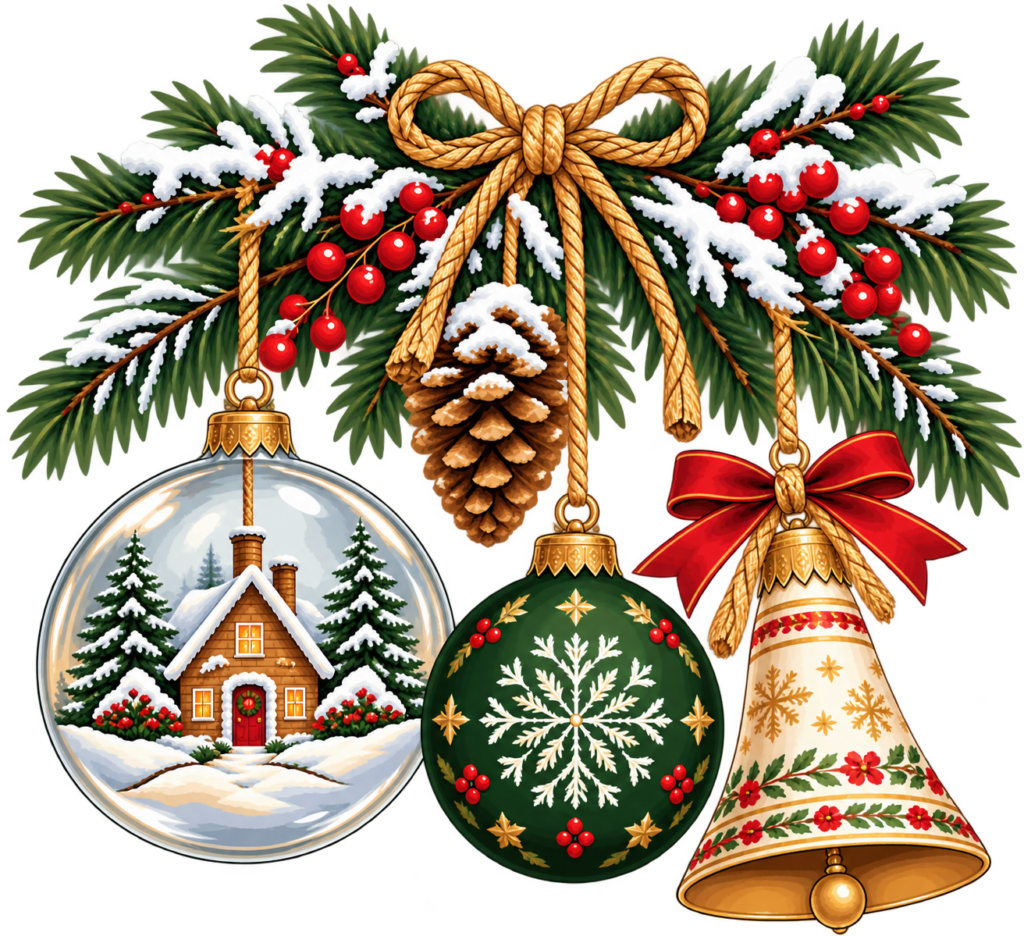
The design brings together three familiar decorations beneath a snowy evergreen swag. The first is a clear glass-style ornament holding a timber cottage with snowy trees, a glowing window and a red door. The second is a rich forest-green round ornament with a symmetrical white snowflake. The third is an ivory-and-gold bell with small botanical details and a red bow. Above them are evergreen needles, red winter berries, a pinecone and a broad rope-style gold ribbon.
The important practical distinction is that this is one 300 × 274-stitch chart, not a pack of three individually charted mini ornaments. The three pieces are visually connected through the hanging branches and ribbons. That makes it especially suitable for framed winter wall art, a mantel display or a seasonal textile panel—rather than three separate small ornament hangers.
The source PDF contains 26 pages: one cover, 24 color-and-symbol chart pages, and a final DMC floss list. The instructions at the end specify two strands for cross stitching. No additional monochrome chart, separate motif files or verified pattern-tracking-app compatibility is claimed.
Choose an Aida count before buying fabric
Fabric count means how many squares fit into one inch of cloth. A full cross usually occupies one Aida square, so the stitch width divided by the fabric count gives the approximate stitched width in inches. The same calculation applies to the height. This straightforward formula helps you avoid buying fabric that is too small for the finished embroidery.
| Fabric | Design width | Design height |
|---|---|---|
| 14-count Aida | 21.43 × 19.57 in | 54.43 × 49.71 cm |
| 16-count Aida | 18.75 × 17.13 in | 47.63 × 43.50 cm |
| 18-count Aida | 16.67 × 15.22 in | 42.33 × 38.66 cm |
For example, on 14-count Aida the 300-stitch width takes roughly 21.43 inches, before you leave any margin for tension, mounting or framing. At 18 count, the picture becomes about 16.67 inches wide. These measurements describe only the full chart grid. You still need extra cloth around it. Your fabric margin depends on how you plan to finish the piece; generous margins are safer than trimming too soon.
Which count is best? Fourteen count is more forgiving if you like larger holes and easier counting, although it makes a broad finished panel. Sixteen count is a middle ground between physical size and hole visibility. Eighteen count produces a more compact design but may be more demanding to see and count. Try a short practice section on your preferred count and decide what is comfortable for you.
If you want a refresher before buying supplies, start with XStitchPattern’s free cross-stitch tools and guides, which include introductions to reading PDF charts and planning fabric sizes.
Eleven DMC colors: what the palette actually includes
The PDF’s thread legend lists eleven DMC shades, including dark green, hunter green, coral red, several warm golds and browns, soft blue-violet, and snowy white. A relatively focused palette can make organizing floss easier than managing dozens of subtly different numbers. It does not automatically make a large chart quick to stitch.
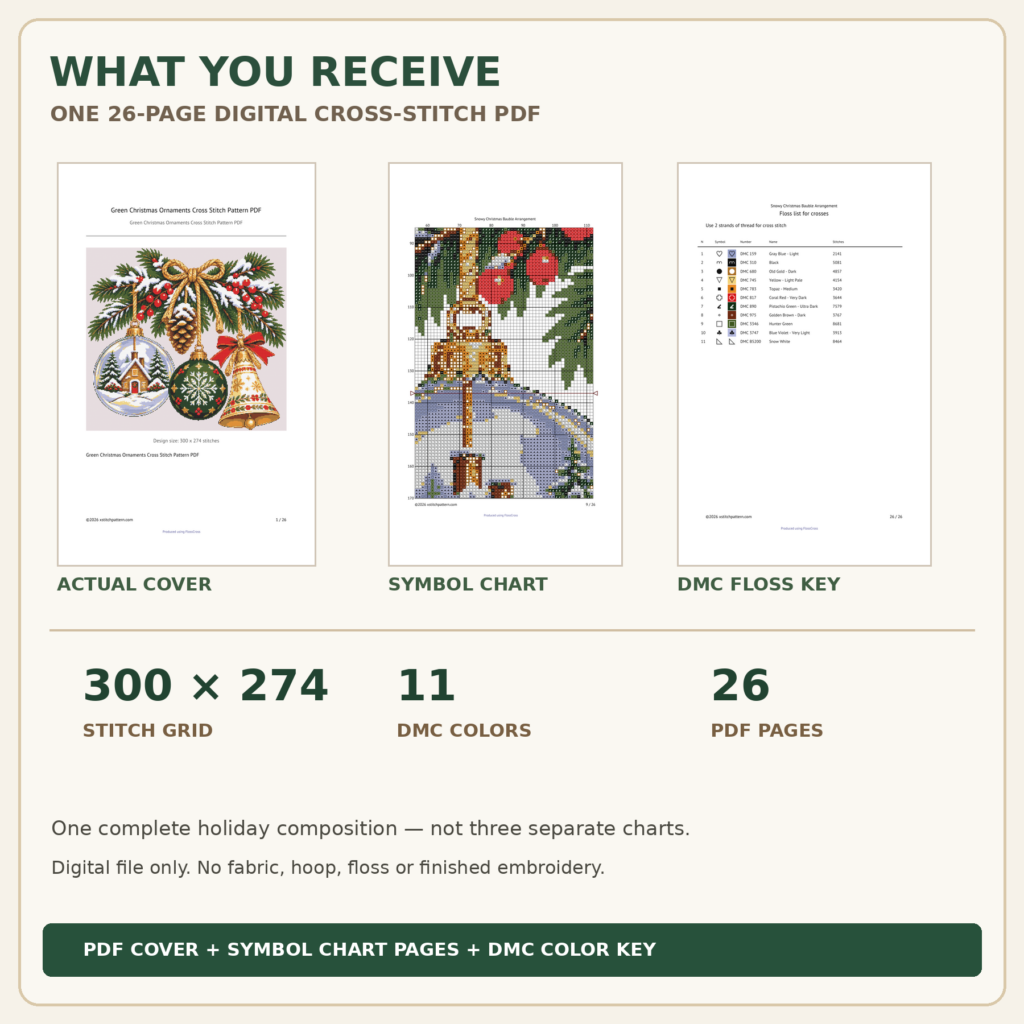
Here is the complete verified floss list from the supplied PDF:
| DMC | Color label | Crosses listed in chart |
|---|---|---|
| DMC 159 | Gray Blue – Light | 2,141 |
| DMC 310 | Black | 5,081 |
| DMC 680 | Old Gold – Dark | 4,857 |
| DMC 745 | Yellow – Light Pale | 4,154 |
| DMC 783 | Topaz – Medium | 3,420 |
| DMC 817 | Coral Red – Very Dark | 3,644 |
| DMC 890 | Pistachio Green – Ultra Dark | 7,579 |
| DMC 975 | Golden Brown – Dark | 3,767 |
| DMC 3346 | Hunter Green | 8,681 |
| DMC 3747 | Blue Violet – Very Light | 3,913 |
| DMC B5200 | Snow White | 8,464 |
The legend totals 55,701 crosses across the eleven color entries. This is the chart’s reported color-by-color total, not the 82,200 cells that would fill the entire 300 × 274 grid. The remaining grid space includes unstiched areas. Always follow the actual symbol legend when working, rather than treating a white-looking square in a preview as white floss.
White stitches versus blank background
This distinction matters particularly for a design with snow. DMC B5200 is a thread color explicitly listed in the PDF. Some snow highlights are meant to be stitched in white. Other empty areas of the chart may be intentionally left as the fabric showing through. If you mistakenly fill every blank square with white thread, you may greatly increase the work and change how the composition looks.
Before stitching, compare the printed symbol key with a few snowy regions of the chart. Confirm what the B5200 symbol looks like. Then keep that symbol consistent as you move between pages. A piece of white Aida does not mean the white-thread symbols are unnecessary; thread and base fabric can reflect light differently.
A reliable starting plan for a multi-page Christmas chart
With a 24-page symbol chart, organization saves frustration. The point is not to rush through the pages, but to avoid losing your position when a branch, ribbon or snowflake continues from one page to the next.
- Check the PDF and print only what you need. Open the original file and check that all 26 pages display correctly. Make an extra working copy of the chart if you prefer marking completed areas with a highlighter.
- Mark the center. Fold the fabric gently in half vertically and horizontally or use a removable method appropriate for the fabric. Confirm the center reference in the chart before counting outward.
- Prepare your floss. Label organizers by DMC code, not by approximate shade names. A gold and a brown may appear similar under warm light but are still different chart symbols.
- Choose a starting section. A distinctive area such as the bold green ornament or strong gold ribbon gives you a clear visual anchor. You do not have to stitch every color in the same order.
- Keep track of page boundaries. If a pine bough crosses a page edge, count the nearby grid markers carefully on both sheets. Avoid assuming that an isolated-looking symbol on one page is a printing error.
- Review progress periodically. After each session, check completed symbols against the PDF at a comfortable zoom level, particularly around the snowy cottage and fine patterned bell.
For long projects, a short, regular stitching session is usually easier to sustain than hoping to finish an entire section in one sitting. Keep enough light on the fabric to distinguish dark greens, dark brown and black without squinting.
Why the hanging ornaments make a pleasing composition
The arrangement has a clear visual hierarchy. The pine bough creates an upper line; the golden knot and pinecone pull the eye toward the center; the three ornaments create a rounded lower edge. The snow-globe cottage adds narrative detail, the green snowflake supplies a bold geometric focal point, and the bell introduces an elegant vertical silhouette. Red berries and the bell’s red ribbon help connect the objects without needing extra decorative motifs.
That structure is helpful when selecting a frame. The artwork has plenty of delicate edge detail, so avoid hiding the hanging ropes or evergreen tips under a mount. Before buying a frame, lay the stitched fabric flat, measure the actual worked area and decide how much blank fabric you want to show around it.
Three finishing choices for a winter display
1. Frame the complete pattern
A simple natural-wood frame complements the cottage and pinecone, while a darker frame emphasizes the pale snow. Keep the finished chart flat and taut without stretching the stitches. If you use a mount, test the opening against the full composition before cutting board or fabric.
2. Make a seasonal wall panel
A hanging textile panel is an option for stitchers who prefer not to use glass. The chart itself does not supply panel-construction instructions, so choose your backing and hanging method separately. Give yourself sufficient plain fabric beyond the stitched area for seams and finishing.
3. Create a keepsake gift
For a friend who loves snow globes, cottage décor or handmade Christmas decorations, a stitched panel can be a meaningful long-term present. Plan for stitching and finishing time. A design this size is not a last-minute card or a handful of small gift tags, even though it uses eleven colors.
How this pattern differs from mini Christmas ornament bundles
Some Christmas search results show collections of tiny separate motifs intended for cards, tags and tree ornaments. Those can be ideal if you want to make many little gifts. The Green Christmas Ornaments chart serves a different purpose: it is one coordinated, detailed scene with a deliberate arrangement of snow, greenery, ornaments and ribbons.
Ask yourself what you actually want to finish. If you need five different gift tags in one week, a small chart set may suit that goal better. If you enjoy a more immersive embroidery project and want one substantial holiday display, this design may be a better match. Neither kind of pattern is inherently better; choosing the right format prevents frustration.
Compare more ideas in the XStitchPattern digital pattern shop. Before purchasing any PDF, read the exact file details rather than assuming every seasonal pattern includes the same chart types or materials.
Frequently asked questions
How many Christmas ornaments are in the pattern?
Three ornaments appear within the artwork—snowy cottage bauble, green snowflake globe and decorative bell—but the download is one combined chart. No separate mini-pattern files are included.
Does an 11-color pattern mean it is beginner-friendly?
Not necessarily. The number of colors is only one factor. This is a 300 × 274-stitch design with many chart pages and 55,701 crosses in the supplied floss legend, so it is most suitable for someone comfortable working carefully with a detailed symbol chart.
Is the PDF a complete physical kit?
No. It is a digital pattern. You must supply the fabric, floss, needle, hoop or other working frame, and any finishing materials.
Can I stitch the design on another Aida count?
Yes, as long as you calculate the finished size and buy fabric with adequate extra margins. Changing fabric count changes dimensions, not the chart’s number of stitches.
Are the product photos actual stitched samples?
Product lifestyle mockups are illustrative digital presentations. For fidelity, use the exact pattern artwork preview and genuine PDF chart sample. A mockup is not a substitute for the downloadable pattern or a test-stitched photograph.
Ready for a seasonal stitching project?
See the complete Green Christmas Ornaments cross stitch PDF pattern for the verified 300 × 274-stitch chart, eleven DMC shades and 26-page digital download. If you would rather browse before choosing, explore our other counted cross stitch patterns.
Want occasional new designs, practical stitching advice and seasonal ideas? Join the XStitchPattern newsletter. The signup is for email updates; it is not the product checkout and does not automatically supply this paid chart.
Editorial note: This guide describes the actual supplied PDF specifications. Fabric sizes are calculated; display and difficulty recommendations are practical advice, not official product guarantees. Always use the supplied symbol key while stitching.