
A cute bunny crochet amigurumi pattern idea is one of those small handmade projects that can feel personal with just a few thoughtful details: rounded cheeks, two soft ears, an embroidered face and a tiny tail. The shape works beautifully for spring decorations, desk companions and handmade gifts, yet it can be adapted for any season by changing the yarn and accessories.
This guide goes beyond inspiration. You’ll learn which materials make a little crochet rabbit easier to work, how to plan the proportions, and how to assemble and customize a simple amigurumi bunny. It also includes an original, free mini-bunny pattern written in US crochet terms with stitch counts to help you practice. The instructions are a new educational draft and have not been physically test-crocheted, so work a sample and check the shaping before relying on them for gifts or sales.
What makes a crochet bunny look especially cute?
A small amigurumi rabbit becomes recognizable through proportions rather than complicated stitch textures. A head that is a little wider than the body creates a gentle cartoon appearance. Long ears immediately distinguish it from a bear; a discreet nose and widely spaced embroidered eyes keep the expression soft. A round tail makes the back just as charming as the front.
Rather than copying another designer’s character, start with the silhouette. Sketch an oval head, a small rounded body, two ears and a pompom-like tail. Decide whether your rabbit will sit upright or have long dangling legs, and choose one defining feature—perhaps a soft green bow, a tiny cardigan or a contrasting ear interior. Keeping the details limited often makes a first bunny easier to finish neatly.
Three bunny styles worth exploring
| Bunny style | Main visual features | Best first-project consideration |
|---|---|---|
| Minimal mini bunny | Round head, two upright ears, tiny body | Fewer sewn-on parts; a nice entry point |
| Floppy-eared rabbit | Longer ears that bend naturally | The ears need flexible yarn and secure attachment |
| Dressed-up storybook bunny | Hat, overalls, scarf or small bag | Make clothing separately only after the body fits |
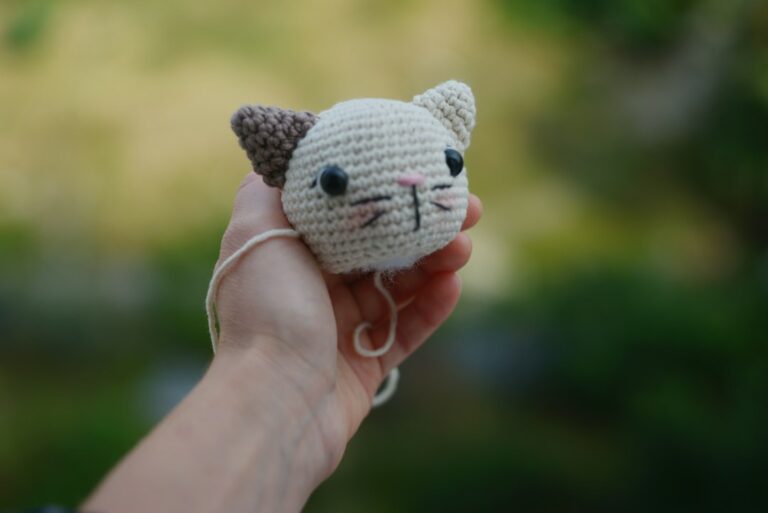
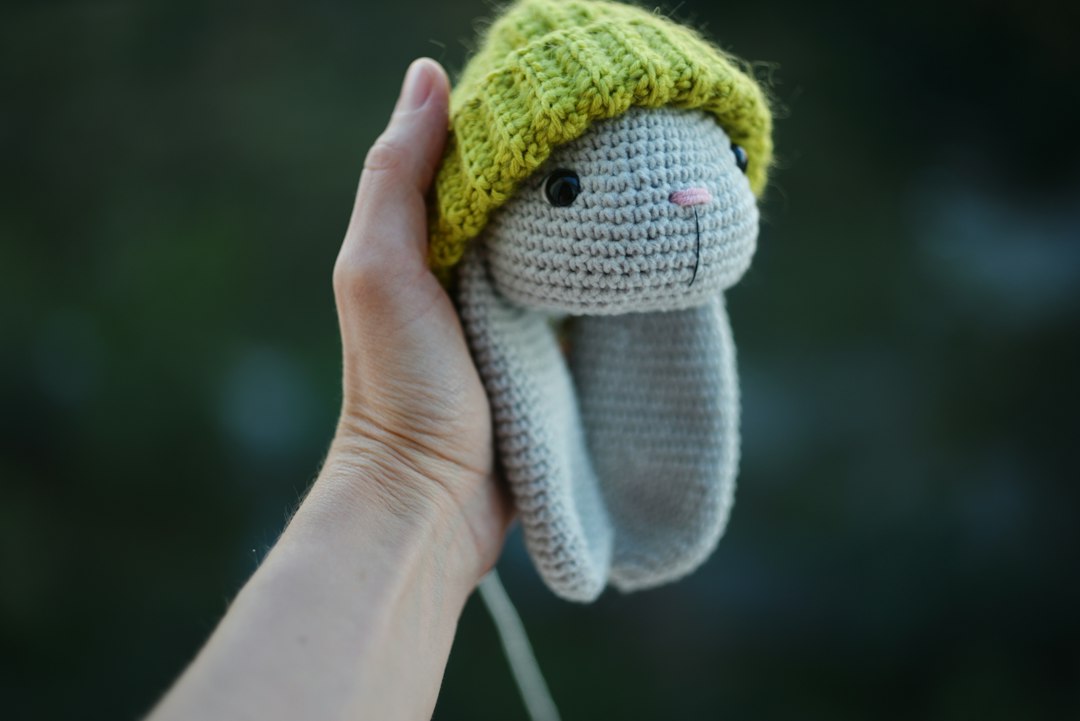
For inspiration, look at the real crocheted rabbit photos in this article: their clothing and ear shapes show how much personality can come from proportion and color. Those photos are editorial examples by independent makers; they are not samples crocheted from our original rounds below.
What supplies do you need for a small amigurumi bunny?
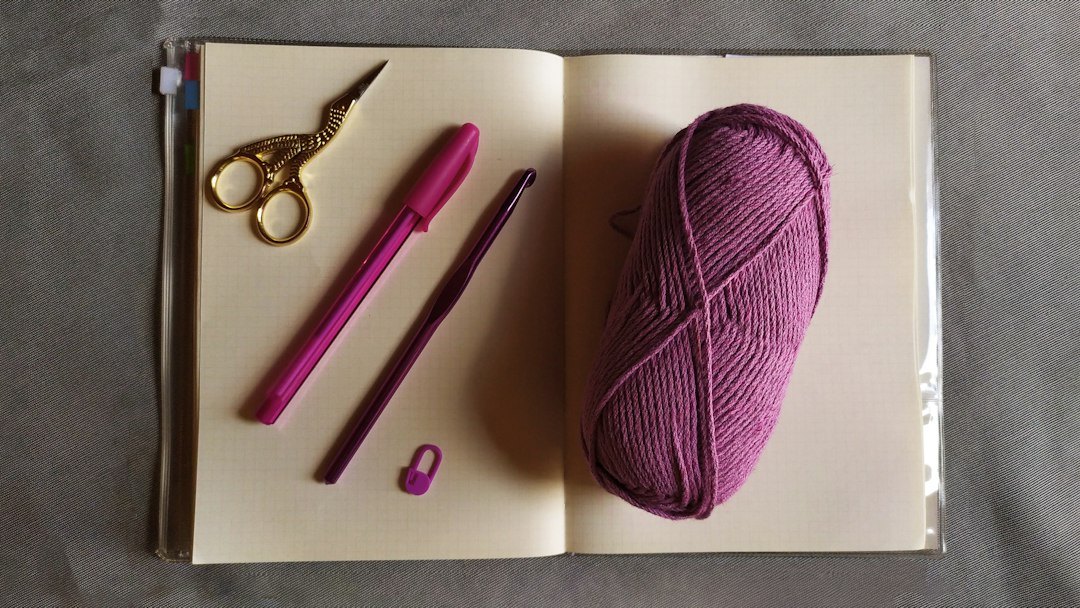
A beginner doesn’t need a huge kit. Choose one smooth yarn in the main rabbit color, a small amount of contrast yarn and a hook that produces a firm fabric. You’ll also need a blunt yarn needle, stitch marker, scissors and suitable stuffing. Test the fabric before committing to a whole toy: when you gently stretch the sample, the stuffing shouldn’t be clearly visible between stitches.
| Supply | Practical choice | What to check |
|---|---|---|
| Main yarn | Smooth cotton or cotton-blend yarn; light/DK can work | Actual label weight, fiber and wash instructions |
| Hook | A size producing dense single crochet fabric | Use millimeter size; it may be smaller than the label suggests for amigurumi |
| Stuffing | Clean washable polyester toy filling if appropriate | Fill gently rather than packing it rock-hard |
| Eyes and face | Embroidery thread or yarn for stitched features | Secure all ends; avoid detachable plastic eyes for young-child projects |
| Other tools | Stitch marker, tapestry needle and scissors | Mark the start of every spiral round |
The Craft Yarn Council’s yarn weight guide gives general yarn-and-hook ranges, but those sizes are not an amigurumi guarantee. For a firm stuffed shape, makers often use a hook that makes tighter stitches than an ordinary garment swatch. A 2.5–3.0 mm hook is an illustrative starting experiment for some light cotton yarns, not a universal requirement. If the yarn is thicker or thinner, follow its behavior rather than forcing that number.
A yarn label also tells you fiber content, care guidance and yardage. Check the Craft Yarn Council’s label information when comparing skeins. The amount of yarn needed for this mini bunny depends on your tension, chosen yarn and whether you add clothing, so no unsupported gram or finished-height promise is made here.
US crochet terms for the original mini bunny
The little bunny below is worked mostly in continuous rounds of single crochet. Place a removable marker in the first stitch of each round and move it upward after each completed round. Unless otherwise indicated, do not slip-stitch to join and do not turn the work. Counts in parentheses are the total stitches after the round, not a further instruction.
| Abbreviation | US meaning | What you do |
|---|---|---|
| MR | Magic ring | Begin a circular center that can be tightened |
| sc | Single crochet | Work one compact stitch into the next stitch |
| inc | Increase | Work 2 sc in the same stitch |
| dec | Invisible decrease or sc2tog | Turn two stitches into one; use the method you know consistently |
| st / sts | Stitch / stitches | Count the stitches made in the round |
| FO | Fasten off | Secure a yarn tail for sewing or weaving in |
Always check whether a crochet pattern is written in US or UK terms. In the standard comparison, US single crochet is UK double crochet. The Craft Yarn Council’s official abbreviation list confirms this difference. If a project suddenly looks much taller than expected, verify the terminology before undoing rounds.
Original mini bunny crochet pattern: head, body, ears and tail
The following is a small original practice pattern for a sitting bunny. It uses simple increases and decreases and deliberately avoids difficult clothing pieces. It is not sold as a separately downloadable PDF, and it has not been sample-tested or size-graded. Make the first version slowly, check stitch counts and adjust ear spacing or stuffing as needed.
Part 1 — rounded bunny head
Work a continuous spiral in your chosen main color. The increasing rounds form the upper dome, the middle rounds hold the cheeks and the decreases close the neck side.
- Round 1: 6 sc in MR (6).
- Round 2: inc in each stitch (12).
- Round 3: [1 sc, inc] repeat 6 times (18).
- Round 4: [2 sc, inc] repeat 6 times (24).
- Round 5: [3 sc, inc] repeat 6 times (30).
- Round 6: [4 sc, inc] repeat 6 times (36).
- Rounds 7–11: sc in every stitch (36 per round).
- Round 12: [4 sc, dec] repeat 6 times (30).
- Round 13: [3 sc, dec] repeat 6 times (24).
- Round 14: [2 sc, dec] repeat 6 times (18).
- Before closing, embroider small facial details and add stuffing gradually. Round 15: [1 sc, dec] repeat 6 times (12).
- Round 16: dec 6 times (6). FO, close the opening securely and weave in the end.
This count progression is internally consistent: each of the six increase rounds adds six stitches until the head reaches 36, and each decrease round removes six. For the face, begin with small embroidered eyes around the middle-to-lower head and a short V-shaped nose. Try the placement with removable markers before sewing. There is no fixed eye spacing suitable for every yarn gauge, so center the features by visual symmetry rather than claiming an exact universal measurement.
Part 2 — compact sitting body
Make the body as a separate piece. It begins at the base, widens into a rounded belly and narrows at the top where the head is attached.
- Round 1: 6 sc in MR (6).
- Round 2: inc all around (12).
- Round 3: [1 sc, inc] repeat 6 times (18).
- Round 4: [2 sc, inc] repeat 6 times (24).
- Rounds 5–8: sc all around (24 per round).
- Round 9: [2 sc, dec] repeat 6 times (18).
- Round 10: sc all around (18).
- Round 11: [1 sc, dec] repeat 6 times (12).
- Round 12: sc all around (12). Stuff, FO and leave a long tail for attaching the open neck to the head.
The base won’t stand rigidly without careful shaping, but it should form a pleasantly rounded lower section. To attach the head, place its underside centrally over the body’s narrow opening, pin in position and sew through corresponding loops with the long tail. Avoid overstuffing the neck seam; a too-firm join can make the head tip backward.
Part 3 — two soft bunny ears
Make two matching ears. These are narrow tubes worked in the round, left unstuffed so they can flatten naturally. The exact bend depends on yarn fiber and tension.
- Round 1: 4 sc in MR (4).
- Round 2: [1 sc, inc] twice (6).
- Round 3: [2 sc, inc] twice (8).
- Rounds 4–10: sc all around (8 per round).
- Round 11: [2 sc, dec] twice (6).
- Round 12: sc all around (6). FO, leave a long sewing tail and flatten the open end. Repeat for the other ear.
Sew the flattened bases onto the upper head on opposite sides of the center line. Try both a slightly spread and a more upright arrangement before stitching them down. With a smaller hook and firm cotton, the ears may stand up; with softer yarn they may droop. Either style can look charming as long as the attachment is neat and the pair is intentionally placed.
Part 4 — little round tail and optional feet
For the tail, make 6 sc in MR (6); increase in each stitch for Round 2 (12); work 12 sc for Round 3 (12); decrease six times for Round 4 (6). Add a very small amount of stuffing, close and sew to the back of the body. You can omit separate feet for the simplest sitting version, or embroider two small toe marks along the lower front of the body after assembly.
If your bunny is meant for display, a tiny scarf can be crocheted as a short row of chains and single crochets, then secured without dangling long ends. Avoid adding small plastic flowers, glued-on beads or detachable buttons to anything that could be handled or mouthed by young children. No handmade toy should be claimed safety-tested solely because its yarn feels soft.
Assembly checklist: get a neat finish instead of a lopsided rabbit
- Check the head orientation. The magic-ring starting area is the top, so position the face and ears before attaching the neck.
- Embroider facial features before closing if access is easier. Hide and secure ends inside the fabric so they cannot pull out.
- Use light stuffing at first. Add small portions and shape with your fingers; a lumpy overfilled head can stretch the stitches.
- Pin both ears in place. Compare from the front and side and use several secure sewn passes.
- Attach the head centrally. Check that the toy can sit or lean as intended before finishing the seam.
- Place the tail at the lower back. Keep it small enough not to tip a display bunny forward.
- Inspect seams and yarn tails. Pull gently on each attachment and correct weak joins before gifting.
If your bunny’s head is too large or ears look uneven
A big head is part of the kawaii look, but it should be supported by the body. If the toy won’t sit, try redistributing stuffing or widening the base in a new sample instead of pulling the neck seam tighter. If the two ears don’t match, count the rows and compare their flattened bases before sewing. Yarn tension differences are often more visible on long narrow parts than on the round head.
For the next prototype, note your yarn weight, hook size, finished dimensions and any modifications. Those four notes are far more useful than guessing that every bunny made from the same written rounds will finish at an identical height.
Seven ways to personalize a cute crocheted bunny
- Classic cream rabbit: natural ivory yarn with tiny stitched rose-colored nose; a timeless nursery-style look for display.
- Blush-pink bunny: dusty pink body with a white tail, suitable for spring decorations and handmade desk gifts.
- Garden bunny: sage-green scarf and a tiny separately made felt-free yarn leaf, for a cottagecore touch.
- Floppy-ear bunny: work several more plain ear rounds in a new test version for a softer profile, then adjust the attachment angle.
- Brown-and-cream woodland rabbit: warm cocoa yarn with a cream muzzle area, keeping the overall shape simple.
- Mini keychain-style display charm: scale down the yarn after testing tension, but never assume a tiny charm with detachable hardware is suitable for infants.
- Seasonal bunny: change a removable-looking accessory design into a securely sewn yarn scarf or a simple embroidered accent for autumn or Christmas styling.
Don’t try to add all seven details to one small bunny. A strong craft photograph usually has one dominant feature: long ears, a neat color contrast or a distinctive little outfit. The same restraint makes the physical project easier to finish.
How does yarn choice change the finished bunny?
With identical stitch counts, thicker yarn and a larger hook usually create a bigger, softer rabbit; finer yarn and a smaller hook often create a more compact one. This is why a photo alone cannot prove a pattern’s finished height. Smooth cotton makes individual stitches easy to see, while fuzzy chenille may hide placement mistakes but can be frustrating when pulling out stitches. Always make a small trial section to check how well the material holds stuffing.
| Yarn approach | What it tends to emphasize | Potential drawback |
|---|---|---|
| Smooth cotton / cotton blend | Visible stitch definition and clean ears | Can feel relatively firm |
| Light acrylic | Soft feel and accessible color range | Some fibers become fuzzy with repeated handling |
| Chenille / plush | Round, cuddly shapes | Harder to see stitch anatomy; some yarns shed or snap |
| Fine cotton with a small hook | Compact details | More demanding counting and tension control |
The Craft Yarn Council’s hook size chart recommends reading millimeter measurements rather than relying solely on letter labels, which can vary by manufacturer. For a stuffed bunny, the deciding test is whether the single-crochet fabric holds filling without large gaps and whether you can work comfortably.
Crochet bunny versus bunny cross stitch: two different handmade gifts
A crocheted bunny is a three-dimensional yarn figure made with a hook. A bunny cross stitch design is a flat counted picture made with needle and embroidery floss. Both have appealing animal silhouettes, but a cross stitch chart cannot simply be turned into an amigurumi pattern and vice versa. Their stitches, materials, measurements and finished uses differ.
If you’re exploring both crafts, our Easter cross stitch patterns guide looks at stitched spring motifs and our Christmas Rabbit Cross Stitch PDF is a separate, purchasable counted cross stitch project. For a three-dimensional holiday crochet theme instead, see our Christmas Cat Ball crochet ornaments guide. None of these resources includes the original bunny crochet rounds on this page as a physical kit.
Looking for more handmade animal and seasonal inspiration? You can browse the XStitchPattern Etsy shop for our current digital cross stitch designs. The Etsy collection is a separate craft category from this free written crochet bunny idea; no Bunny Amigurumi PDF is being advertised as available there.
Gift presentation, care and toy-safety considerations
A miniature crocheted rabbit can be a charming desk companion, shelf accessory or handmade present. But a decorative craft and a toy intended for young children aren’t interchangeable. Small detachable eyes, beads, buttons, ribbons and metal keyring parts can create hazards. For a child-facing project, choose embroidered facial details, secure every attachment and consider the applicable toy requirements in your market. This article does not certify the bunny as safe for babies or toddlers.
Care also depends on yarn and stuffing. Read the fiber label before washing, and test an inconspicuous section if you’re unsure whether dark accent colors bleed. For gifts, include a simple note listing the materials you used and any cleaning limitations. Never promise machine-washability without checking the components.
Frequently asked questions about beginner bunny amigurumi
Is this a free bunny crochet pattern or just an idea?
It is an original mini-bunny written practice pattern within this article, accompanied by styling ideas and assembly guidance. It has not been physically sample-tested, and we are not offering a separate verified downloadable PDF. Follow the stitch counts and test your first sample before gifting.
Can complete beginners crochet this bunny?
It is a reasonable next step once you can work single crochet in a continuous spiral, make increases and decreases, count rounds and sew pieces together. A first-time crocheter may wish to practice a small sphere before making the ears and assembling the toy.
What size hook should I use for a bunny amigurumi?
There is no single correct hook size independent of yarn weight and tension. Use the yarn label as a starting reference, then make a small sample with a hook that produces dense, comfortable single crochet stitches without visible stuffing gaps.
How big will the finished rabbit be?
The pattern gives stitch counts rather than a verified height. Finished measurements depend on yarn thickness, hook, tension, stuffing and ear positioning. Do not rely on a number taken from another maker’s photograph.
Can I use safety eyes instead of embroidering the face?
Plastic craft eyes may be marketed as “safety eyes,” but that label alone does not establish suitability for small children. For a toy that might be mouthed by a baby or toddler, avoid detachable small components; embroidered features are generally a more conservative design choice, and the finished item still needs proper safety assessment.
How do I make floppy bunny ears?
Choose flexible yarn, reduce stuffing in the ear to none, and attach them at an angle rather than upright. Experiment with more plain ear rounds on a test version; longer ears can bend naturally, but their shape is not guaranteed without sampling.
Can I sell bunnies made from this original idea?
This is a newly written educational design idea, not a commercial pattern with a stated resale license or a tested toy specification. If you plan to sell finished items, you are responsible for your own quality, labeling, safety compliance and any applicable intellectual-property requirements. Do not use the Unsplash photos as proof of a finished item you made.
Start with one well-finished little rabbit
The cutest bunny amigurumi isn’t necessarily the one with the most accessories. Begin with a round head, a body that sits comfortably, two matching ears and an embroidered expression. Make one test piece, record the changes you prefer, and only then add outfits or extra details. That approach produces a more personal handmade result and teaches skills you can reuse for cats, bears and other small crocheted animals.
For another yarn craft, explore our cat ornament crochet guide; for counted needlework, see our Easter bunny cross stitch inspiration. You can also join the XStitchPattern Stitch Studio newsletter for cross stitch patterns, tutorials and updates—the signup is separate from this free crochet instruction.
For colorful home decor instead of a stuffed toy, learn how to crochet a scrap-yarn Christmas light garland. It explains yarn budgets, the original free Ravelry light-bulb design and an independent flat appliqué tutorial.
Editorial photography: Liana S and Karina L via Unsplash. These images show independent craft examples and supplies, not a sample made from the original instructional rounds above.