
One of the most captivating things about the northern lights is the contrast: brilliant green ribbons move across an almost-black sky while mountains and forest silhouettes remain quietly in place. A northern lights cross stitch pattern translates that contrast into thread, one small square at a time. If you’re planning an aurora borealis landscape project, the most useful preparation happens before your first stitch: choosing fabric, understanding the chart and organizing the color areas.
This guide uses the Northern Lights Cross Stitch Pattern created for XStitchPattern as a worked example. Its rounded night-sky composition features turquoise-green aurora ribbons, a pink-violet horizon, snowy peaks, a forest and a lake. The supplied PDFs specify a 300 × 286-stitch chart, 16 DMC colors and two strands for cross stitch. We’ll use those verified details to plan the project rather than relying on an approximate photo size.
What makes a northern lights cross stitch design distinctive?
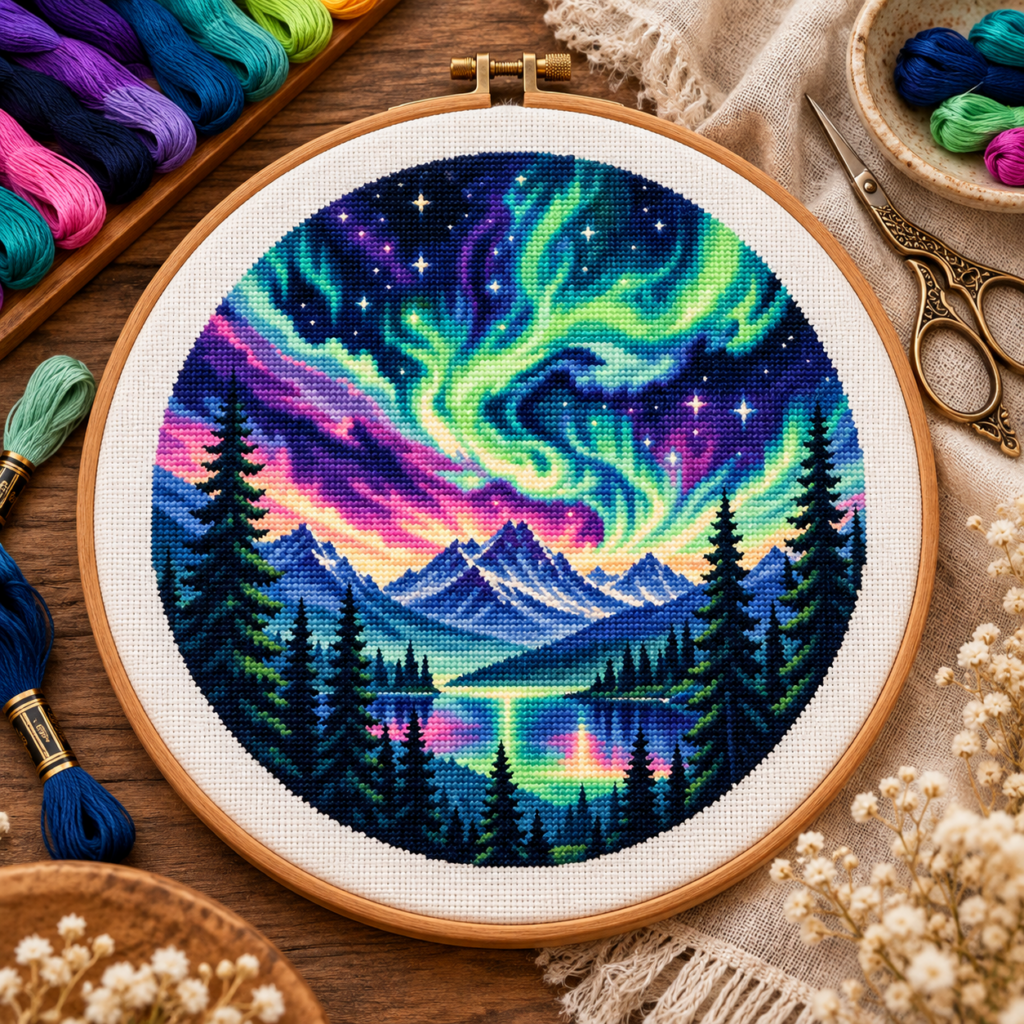
An aurora scene depends on relationships between large areas of color. The near-black sky gives the green light room to appear luminous. Cool blues separate distant mountains from the foreground, while smaller pink and violet areas suggest the changing light near the horizon. Trees along the sides give the image depth without requiring a detailed botanical portrait of every branch.
In this particular design, the lake repeats the sky’s turquoise, violet and pink tones. That reflection is not only decorative; it gives the eye a visual route from the upper aurora down through the mountains and into the water. Because the chart has a rounded outline, the surrounding fabric remains part of the finished presentation.
Practical implication: choose a fabric color that lets the dark edge of the scene stay visible. If you plan to display the work on a dark background, examine a preview of the outer silhouette before committing to fabric.
Know the pattern specifications before buying supplies
The downloadable XStitchPattern charts contain two separate versions of the same counted cross stitch design: a 26-page color-symbol PDF and a 26-page black-and-white symbol PDF. The final page in each file contains the thread key. These are printable charts, not a kit; fabric, DMC threads, needle and hoop are separate purchases.
| Specification | Chart detail |
|---|---|
| Chart dimensions | 300 stitches wide × 286 stitches high |
| Thread palette | 16 listed DMC colors |
| Charted cross stitches | 62,612 in total, summed from the supplied floss list |
| Thread strands | 2 strands for cross stitch |
| File formats | Color PDF + black-and-white PDF, 26 A4 pages each |
| Outline | Rounded landscape with intentionally unstitched surrounding area |
That is a sizable project. It is better approached in manageable sections than treated as a quick weekend embroidery. A stitch count tells you how large the project is, but it does not reliably tell you how many hours or skeins every individual stitcher will need.
14, 16 or 18 count Aida: how much fabric do you need?
The calculation is simple when you know the stitch dimensions: stitched inches = stitch count ÷ fabric count. For 14-count fabric, each inch holds 14 stitches, so a 300-stitch width is about 21.43 inches. Remember that this is the chart area, not the piece of fabric you should cut.
| Aida fabric | Design (cm) | Design (in) | Suggested fabric cut (cm) |
|---|---|---|---|
| 14 count | 54.43 × 51.89 | 21.43 × 20.43 | 69.67 × 67.13 |
| 16 count | 47.63 × 45.40 | 18.75 × 17.88 | 62.87 × 60.64 |
| 18 count | 42.33 × 40.36 | 16.67 × 15.89 | 57.57 × 55.60 |
The suggested cut adds approximately 7.62 cm (3 inches) to each of the four sides. Framing methods differ, so check with your framer or adjust your margins before cutting. If you prefer a larger, easier-to-see grid, 14-count can be a comfortable option; if you want a smaller framed piece and are happy working finer stitches, consider 16- or 18-count.
For a fuller comparison of fabric counts, read our 14, 16 or 18 count Aida size guide.
Understanding the 16-color DMC palette
The palette in the supplied PDFs is much more concise than the number of color transitions you might imagine when looking at a stylized aurora image. Sixteen DMC shades build the sky, mountains, forests and water. Importantly, the PDF’s symbols and color numbers—not your monitor—are the authority for stitching.
Deep sky and structure
DMC 310 (Black) and 3842 (Wedgwood – Very Dark) carry major dark areas. DMC 310 appears in 17,607 listed stitches, while DMC 3842 appears in 14,607. Those two alone account for a substantial portion of the design, so keep them clearly separated and labeled to reduce mistakes when moving between sky and forest shapes.
Aurora ribbons and lake reflections
Green and turquoise tones include DMC 913, 955, 3844, 3846 and 3850. Together they create much of the distinctive northern-lights color family. The design’s blue-violet transitions also make use of DMC 155, 3837 and 3838.
Horizon and softer highlights
Pink, mauve and warmer highlights are represented in the chart by DMC 603, 761, 3688, 453, 746 and 950. The exact placement of each shade comes from the included chart, so rely on the symbols rather than improvising from a promotional image.
Organize the 16 colors in numerical order or group them into labeled project cards. In either approach, record each symbol beside its DMC code. A color name alone is not enough when two shades look similar under warm room lighting.
How to stitch a large aurora borealis chart without losing your place
1. Choose a consistent starting point
Many stitchers find it reassuring to mark the fabric center before beginning. Fold the fabric gently in half horizontally and vertically, then confirm how the chart center corresponds to the pattern’s page markings. If you prefer starting at an edge or in one distinctive mountain section, count carefully from a confirmed reference point first.
2. Compare the color and black-and-white charts
The color-symbol version is helpful for understanding where large regions change; the monochrome version may help you distinguish symbols without relying on color. Print a single sample page at your intended size and check that the symbols are legible. The two supplied files depict the same 300 × 286-stitch design, so choose the format that feels clearer to you.
3. Work in planned sections
Break the scene into practical areas: upper sky, broad aurora bands, mountain skyline, lake, then dark trees and the curved outer edge. You do not have to stitch them in that exact order; the goal is to avoid jumping around the whole design without a tracking system. A paper highlighter, digital PDF annotation or gridding method can help you see what is complete.
4. Keep the top leg of every cross in one direction
Consistent stitch direction makes adjacent color areas look more even. Avoid pulling floss too tightly in the sweeping aurora bands. A smooth, flat stitch often shows color transitions more clearly than a tight, distorted one.
5. Check chart boundaries, especially in the dark areas
The landscape is a rounded composition on a rectangular chart grid. Empty squares beyond the design outline are not automatically filled with thread. Before working along the outer curve, compare your position with the chart grid carefully so the boundary stays consistent.
If you’ve never used a multi-page PDF chart before, our illustrated guide explains cross stitch symbols, color keys, page navigation and center markings.
Supplies checklist for this project
- Aida fabric or another evenweave compatible with your experience and desired finished size.
- The 16 DMC shades specified in the PDF thread legend, in quantities appropriate to your stitching technique and fabric count.
- A tapestry needle suited to your fabric, plus a spare if you prefer.
- A hoop, frame or other support large enough for the area you will work on; a scroll frame can be useful for a project of this size.
- Embroidery scissors, floss organizers and a removable fabric-marking or counting method if desired.
- A printed or digital copy of your preferred PDF chart for tracking progress.
Do not purchase a fixed number of skeins based solely on the number of stitches. Floss consumption varies with stitch coverage, tension, waste and fabric count. The chart supplies stitch totals by color, which you can use with your own preferred floss-estimation method.
Framing a round landscape on a square piece of fabric
The shape creates two distinct design decisions: the stitched motif itself and the unstitched fabric beyond it. A simple square frame emphasizes the circular scene, much like a window into a landscape. A round frame or large display hoop can also work, provided there is sufficient clearance around the design and your finishing method accommodates its actual stitched size.
Test the layout with a paper template of the stitched dimensions before buying an expensive frame. The 300 × 286-stitch chart is slightly wider than it is tall, so do not assume every circular frame will fit perfectly without checking.
For a nature-themed grouping, browse more Flowers & Nature patterns or discover the wider Travel & Places collection.
Is the Northern Lights pattern right for you?
Choose this project if you like building a large picture in stages, are comfortable distinguishing a symbol key and enjoy the contrast between dark silhouettes and luminous scenery. With 62,612 charted cross stitches, it is not designed as a fast first project. If you are completely new to counted cross stitch, consider practicing the stitch and chart symbols on a smaller design before committing to this landscape.
Ready for the challenge? Explore the Northern Lights Cross Stitch Pattern PDF to see the exact download details and the two available chart versions. If you would rather start smaller, join the XStitchPattern Stitch Studio for a free welcome pattern (email signup and confirmation required).
Frequently asked questions
How many colors are in the Northern Lights cross stitch chart?
The two uploaded XStitchPattern chart PDFs list 16 DMC colors on their final pages.
Can I stitch it on 14-count Aida?
Yes. The 300 × 286-stitch chart measures approximately 54.43 × 51.89 cm on 14-count Aida before margins.
Does the download include a black-and-white chart?
Yes. The product includes both a color-symbol PDF chart and a black-and-white symbol PDF chart, each with 26 A4 pages.
Is this a full-coverage rectangular cross stitch?
No. The artwork fills a rounded central shape, with blank chart squares around the outline. The rectangular chart dimensions are used for fabric planning.
Is the pattern beginner-friendly?
It is a substantial, detailed project rather than a beginner mini. Confident intermediate and experienced stitchers are the better target audience.
Final thought: plan the fabric, then enjoy the color
A northern lights scene is rewarding because the visual result emerges gradually: scattered lights become moving ribbons, the mountain line gains depth and the lake begins reflecting the sky. Start with the verified chart measurements, keep the 16 floss colors organized and choose the symbol version you read most comfortably. That preparation leaves more energy for the part you came for—the pleasure of stitching the landscape.
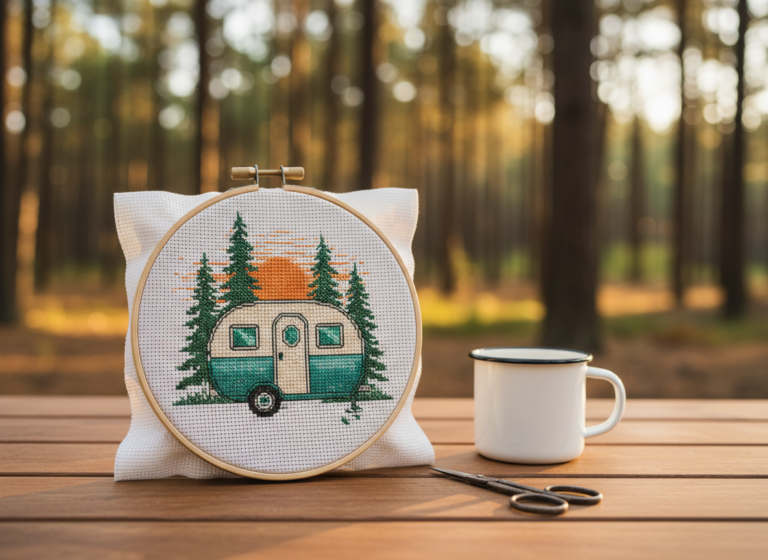
If you like stitching the places that make travel memorable but want a much smaller companion project, our retro camper van cross stitch guide covers a 59 × 37-stitch trailer, fabric sizing and ways to make a road-trip keepsake.
For more practical guidance and new design releases, explore the XStitchPattern stitching guides or subscribe to our newsletter.
Editorial transparency: the example chart was prepared from an AI-assisted digital illustration and converted into a counted cross stitch pattern with FlossCross. The measurements and thread details above are taken from the finished chart PDFs. Styled product mockups are not evidence of a physically stitched sample.