

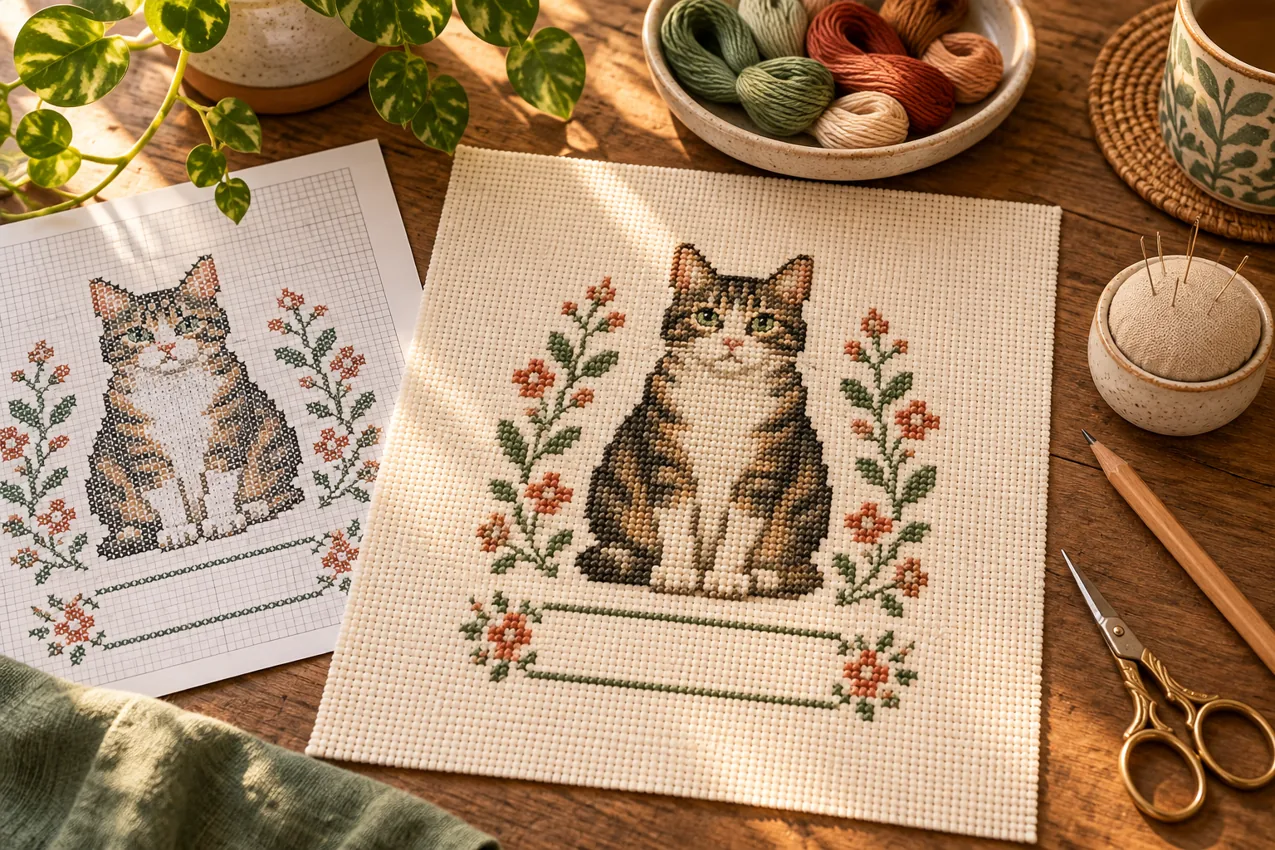
A cat cross stitch pattern becomes a personal gift when a name sits comfortably beneath or beside the motif. The main challenge is layout: letters that look short on screen can occupy many chart squares, and a long name can make the whole sampler wider than the cat. Plan the complete design on a grid before putting the first stitch into your main fabric.
In this guide
- Plan the name before you stitch the cat
- Measure the lettering accurately
- Combine the motif and text boxes
- Center the name on the chart
- Choose readable letters and thread
- Stitch and finish in a controlled order
- Personalization questions
Plan the name before you stitch the cat
Use a chart and alphabet whose permissions allow your intended adaptation. This guide explains how to combine their dimensions; it does not supply a commercial pattern or authorize redistribution of someone else’s work. If you are still choosing a motif, compare the shapes in our cat pattern selection guide.
Measure the lettering accurately
Count each letter’s actual chart width, including any descenders or outlines. Add the blank columns between letters and any spaces between words. For a hypothetical name made from letter widths of 5, 5, 3 and 5 squares, with one blank column between adjacent letters, the total is 21 squares: 18 stitched-width columns plus three gaps.
Do not assume every letter has the same width. A narrow I and a wide M can alter the visual balance. Draw the name on squared paper or use charting software, keeping an unaltered copy of the source alphabet. Check spelling against the exact name supplied by the recipient before stitching.
Combine the motif and text boxes
Imagine a cat motif that is 35 stitches wide and 42 stitches high. Place a 21-stitch-wide, 7-stitch-high name below it with five blank rows between them. The combined bounding box is 35 × 54 stitches, provided the lettering and any backstitch stay within those dimensions.
On 14-count Aida, that example is 2.5 × approximately 3.86 inches. With an illustrative 3-inch margin on every side, the starting fabric would be about 8.5 × 9.86 inches; rounding up to a convenient cut can make handling easier. Confirm the mount before choosing a margin. Our fabric calculator guide explains the formula.
Center the name on the chart
Find the center column or the line between the two central columns of the full layout. Center the lettering box on that reference rather than starting directly beneath the cat’s left edge. If an odd-width motif and an even-width name do not share the same center column, choose a deliberate half-square visual offset on the planning grid rather than adding fractional stitches accidentally.
Paper planning also reveals whether the tail makes the cat look visually heavier on one side. Mathematical centering is a reliable start, but you can compare two sketched arrangements before choosing. Keep the approved layout so you do not have to make spacing decisions while counting on fabric.
Choose readable letters and thread
Small block alphabets are easier to count than elaborate script at a very small scale. Look carefully at letters with enclosed spaces, such as A, B and R: the holes need to remain recognizable. If the name cannot fit, choose a wider finish, a smaller complete alphabet or a two-line arrangement. Compressing random letters usually makes the name inconsistent.
Choose lettering that contrasts with the cloth and relates to the cat palette. Stitch a short test if you plan very dark text on light Aida. Use the chart’s strand instructions and check coverage before changing them. For technique help, consult DMC’s cross stitch resources.
Stitch and finish in a controlled order
Mark the full design center with removable basting, then stitch a stable part of the cat. Count the planned blank rows carefully before starting the name. Check the first and last letters against the chart center before filling the middle. Add any outlines only after verifying the spelling and spacing.
A frame or hoop should leave the name breathing room. Avoid trimming the cloth immediately after the last cross; finish any appropriate cleaning first and allow it to dry completely. Our hoop finishing guide explains a neat backed finish. Keep a small record of the fabric count and palette if you may make a matching sampler later.
Personalization questions
Can I add a date too? Yes, but include its full width, height and line spacing in the original layout calculation.
Should I stitch the name first? Either order can work. The important step is planning the whole bounding box before you begin and counting from verified reference points.
Can I sell the adapted chart? Do not assume so. Check the motif and alphabet licenses separately. Permission to stitch an item does not automatically grant permission to redistribute a modified chart.
 English
 French
 Spanish
 German
 Arabic